How to Set Up WooCommerce Store
Having an online store is crucial for businesses of all sizes. WooCommerce, a powerful and customizable eCommerce plugin for WordPress, has become one of the most popular solutions for managing an online store.
Whether you’re a small business owner looking to expand your reach or an entrepreneur starting a new venture, setting up a WooCommerce store can provide a robust platform for your eCommerce needs.
This guide will walk you through the essential steps to set up your WooCommerce store, from installation to customization.
You’ll learn how to configure key settings, add products, and optimize your store for a seamless customer experience. By the end of this guide, you’ll have a fully functional WooCommerce store ready to attract and serve customers.
Whether you’re tech-savvy or new to website management, this comprehensive overview will help you navigate the process with ease.
Why Is WooCommerce So Popular?
WooCommerce has rapidly become the go-to solution for creating online stores, and its popularity is not without good reason. Here are several key factors contributing to WooCommerce’s widespread acclaim:
Ease of Use: WooCommerce integrates seamlessly with WordPress, making it accessible for users already familiar with the platform. Its user-friendly interface allows even beginners to set up and manage their online stores without extensive technical knowledge.
Customization and Flexibility: One of WooCommerce’s standout features is its high level of customization. With thousands of themes and plugins available, users can tailor their stores to meet specific needs and preferences. Whether you need advanced product variations, unique design elements, or specialized functionality, WooCommerce can accommodate your requirements.
Scalability: WooCommerce is suitable for businesses of all sizes, from small startups to large enterprises. As your business grows, WooCommerce can scale with you, offering tools and extensions to handle increased traffic, more products, and complex transactions.
Cost-Effective: WooCommerce itself is free, which makes it an attractive option for new businesses and those on a tight budget. While there are costs associated with premium themes, plugins, and hosting, the overall expense remains competitive compared to other eCommerce solutions.
Extensive Community and Support: Being an open-source platform, WooCommerce benefits from a large and active community. This means a wealth of resources, including tutorials, forums, and documentation, are readily available. Additionally, many developers specialize in WooCommerce, providing professional support and custom development services.
SEO-Friendly: Built on WordPress, WooCommerce inherits strong SEO capabilities. It allows for comprehensive SEO customization, helping your products rank better in search engines and driving organic traffic to your store.
Security: Security is a top priority for any eCommerce platform. WooCommerce is built with secure coding practices and receives regular updates to address vulnerabilities. Additionally, numerous security plugins can further enhance your store’s protection against threats.
Integration Capabilities: WooCommerce integrates with a wide range of third-party services, including payment gateways, marketing tools, and shipping providers. This interoperability makes it easier to manage various aspects of your eCommerce business from a single platform.
Mobile-Friendly: With a growing number of consumers shopping on mobile devices, having a mobile-friendly store is crucial. WooCommerce themes are generally responsive, ensuring your store looks and functions well on smartphones and tablets.
Complete Guide to Setting Up Your WooCommerce Store
Step 1: Install the WooCommerce Plugin
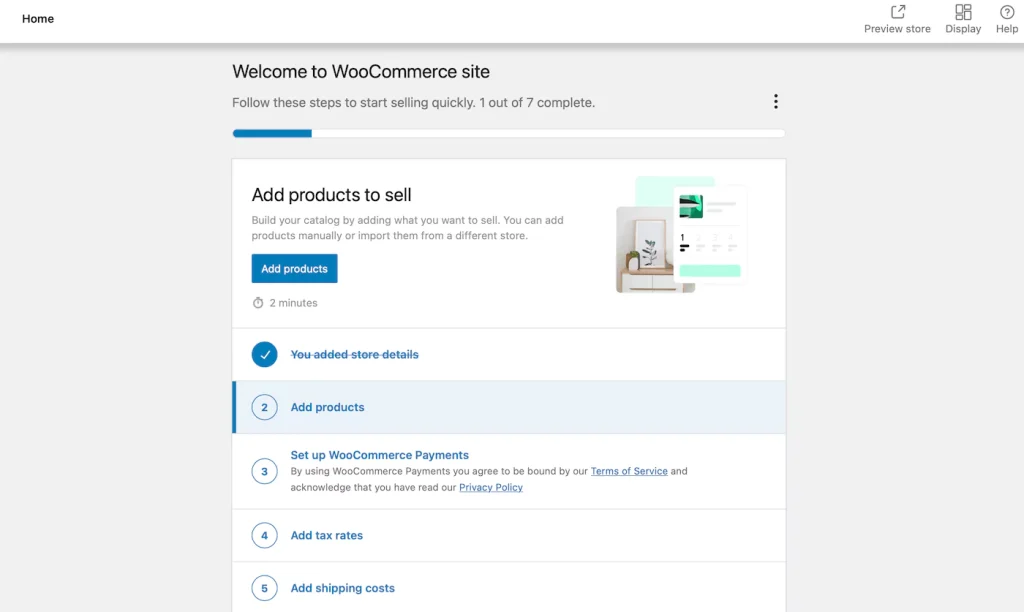
Installing WooCommerce is straightforward. Navigate to Plugins > Add New in your WordPress dashboard. Search for “WooCommerce” and click “Install Now.” Once the installation is complete, activate the plugin. A WooCommerce link will appear under your Plugins menu.
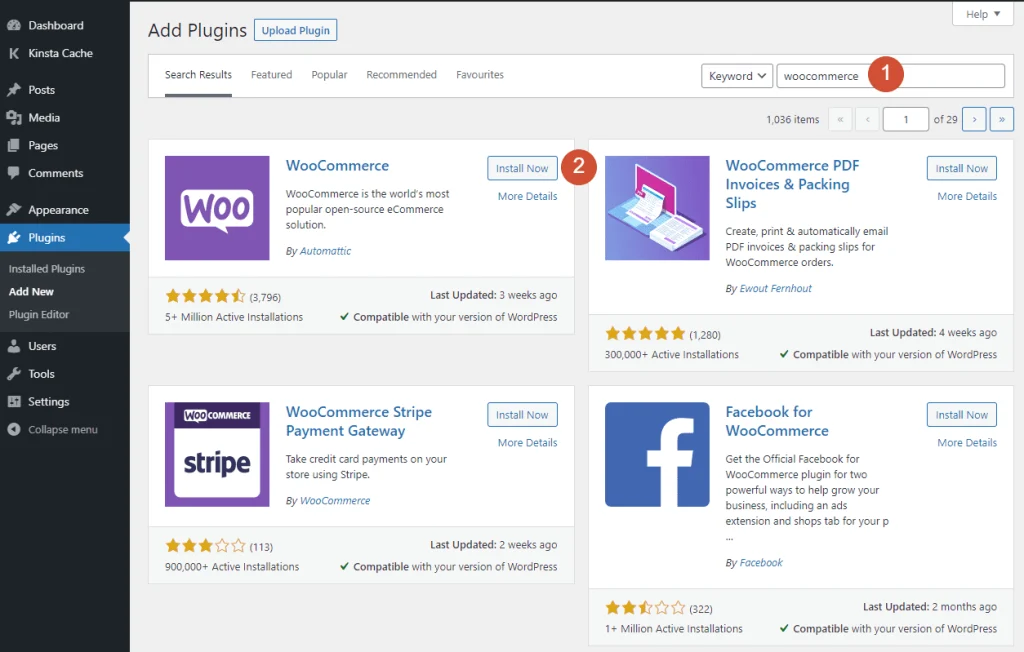
Upon activation, you will see a message in the WooCommerce Dashboard:
“Welcome to WooCommerce – You’re almost ready to start selling :)”
To configure your store, click the Run the Setup Wizard button. If you accidentally skip this step, you can access it later via Help > Setup Wizard.
Step 2: Set Up Your WooCommerce Store
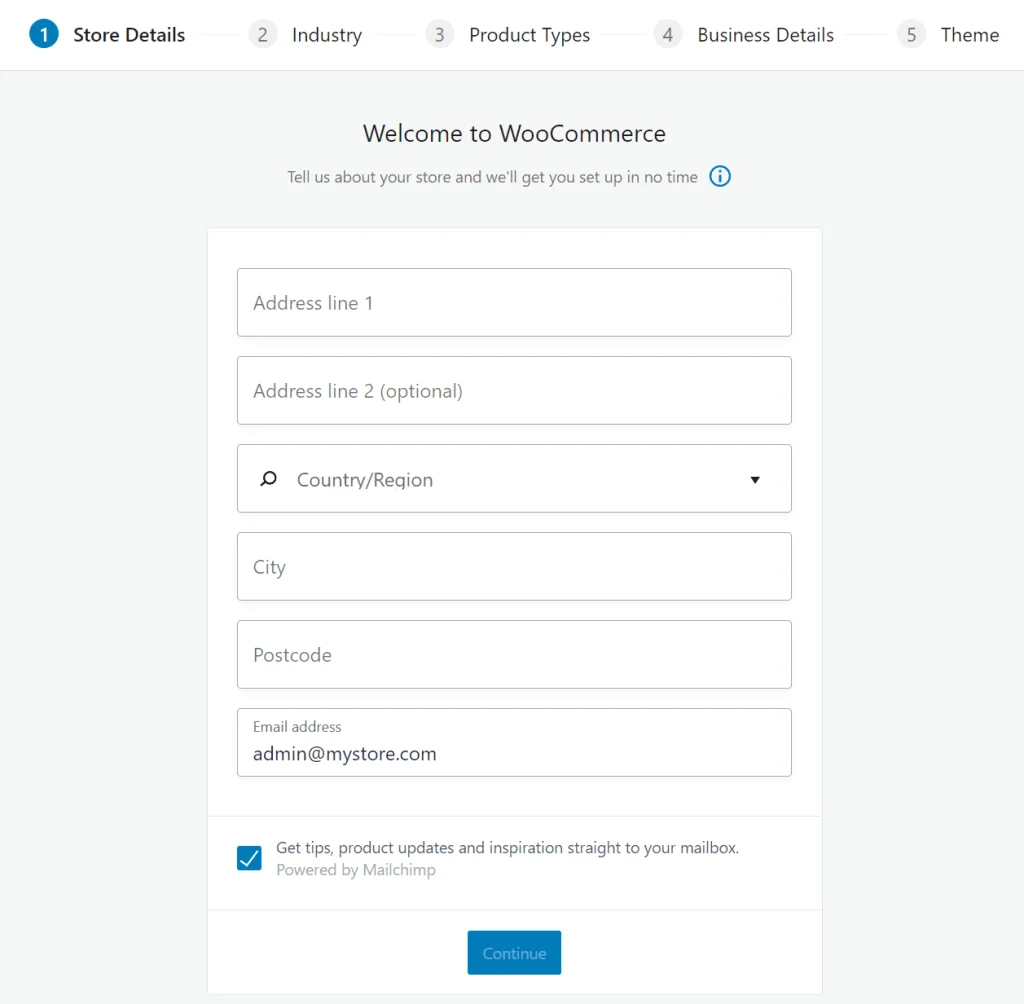
The setup wizard will first ask for your store’s location. This information is crucial for calculating shipping costs and taxes accurately. You will need to fill out the following fields:
- Country
- Address
- City
- State
- Postal Code/ZIP
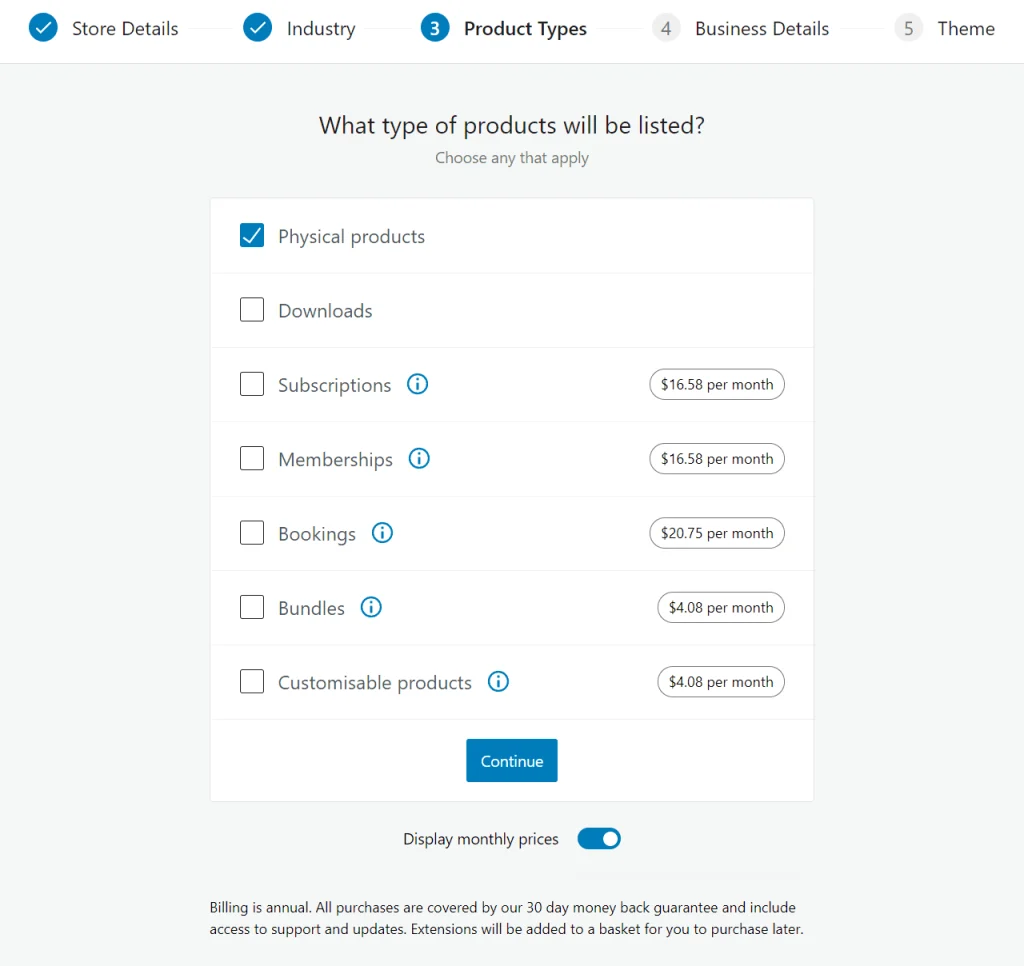
Next, select the currency you will accept in your store. You also need to specify the type of products you will sell. WooCommerce offers three options:
- Physical and digital products
- Physical products
- Digital products
Lastly, the wizard will request permission to collect usage data. Click Let’s go! to proceed to the next section.
Step 3: Choose the Payment Gateway
In this step, choose the payment platforms for your WooCommerce store. The two primary options are:
- Stripe: Offers lower commissions and allows transactions without leaving the checkout page.
- PayPal: Convenient and widely used.
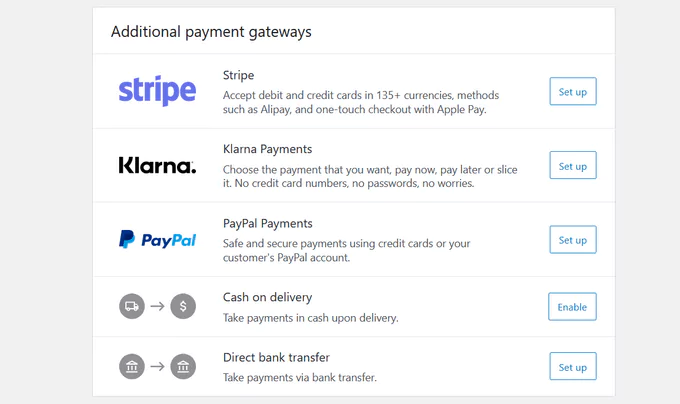
Additionally, you can enable offline payment methods such as:
- Check
- Bank transfer
- Cash on delivery
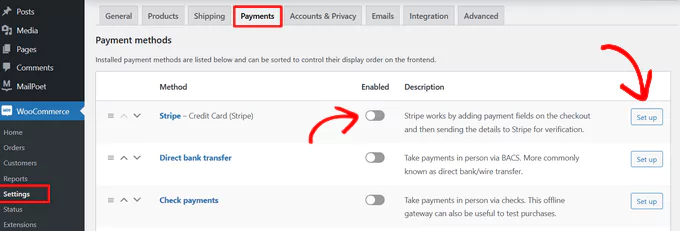
Depending on your selection, WooCommerce will install the necessary plugins. Click Continue to proceed.
Step 4: Configure the Shipping Methods
WooCommerce sets up two default shipping zones. You need to configure the shipping methods and set the pricing model (fixed rate or free shipping). Depending on the regions you ship to, further adjustments might be needed after the initial setup.
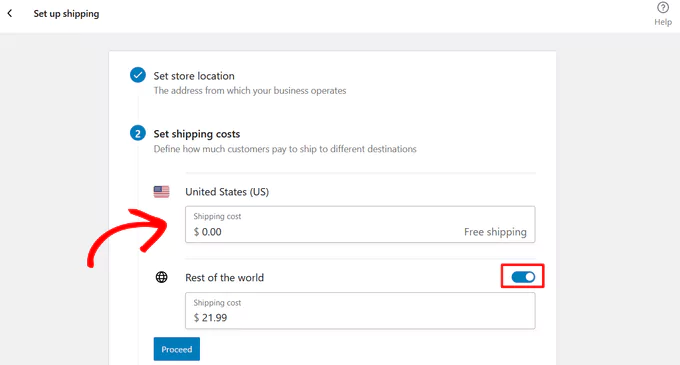
You will also choose a measurement system (e.g., Ounces and Inches). After selecting your preferences, move to the next step.
Step 5: Select the Recommended Extensions
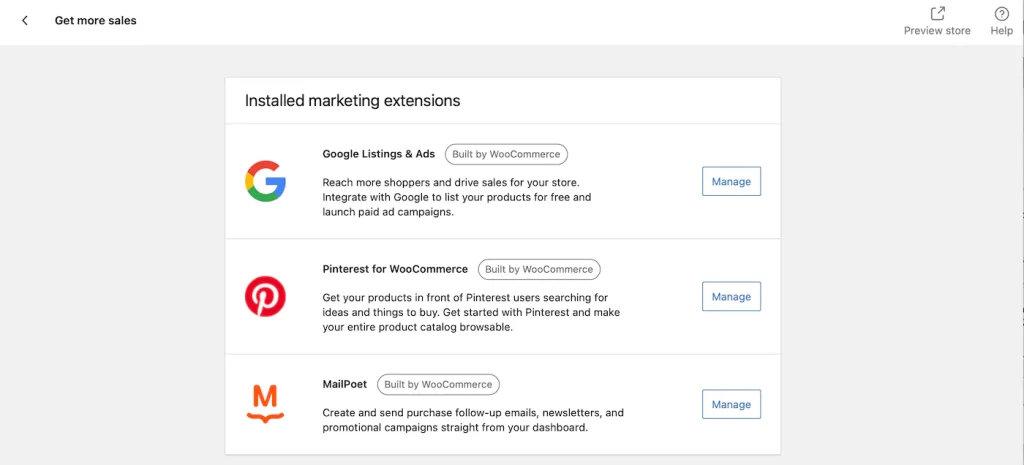
Based on your location and store configuration, WooCommerce may recommend installing several extensions to enhance functionality. It’s advisable to select all the recommended options and click Continue. These extensions include:
- Automated Taxes: Automatically calculates taxes at checkout.
- MailChimp: An email marketing tool for collecting subscriber data and sending promotional emails.
- Facebook: Integrates social media functionality, including tracking pixel and catalog synchronization.
How to Configure WooCommerce Settings
To fine-tune your WooCommerce store, go to WooCommerce > Settings in your WordPress dashboard. Here, you can adjust the default settings, including those configured during the setup wizard and others automatically set by WooCommerce.
WooCommerce > Settings > General
The General tab includes options related to your store address, which you configured in the setup wizard. Additionally, you can:
- Select the countries you want to sell to.
- Configure the currency settings.
- Enable the use of coupons.
- Decide if you want tax calculations done automatically (recommended).
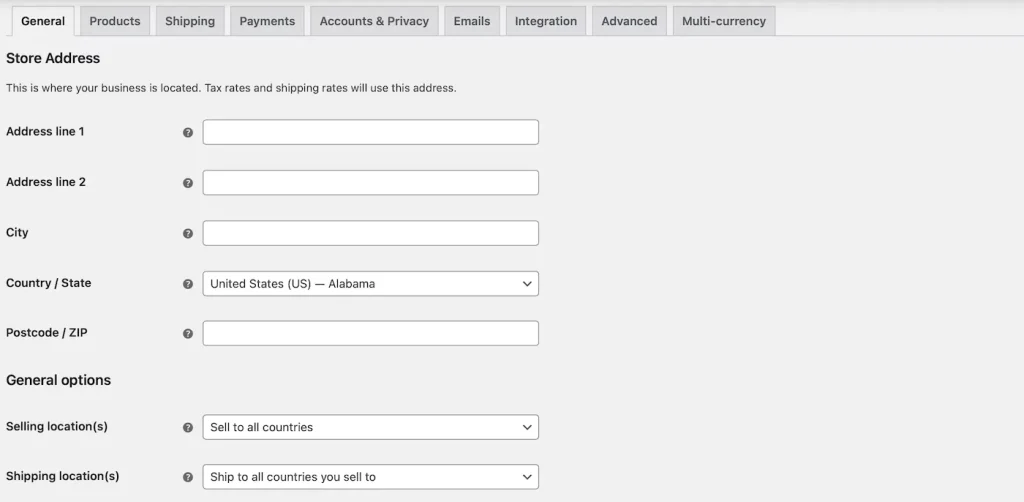
After making changes, remember to save them before moving to the next tab.
WooCommerce > Settings > Products
The Products tab is divided into three sections: General, Inventory, and Downloadable Products.
- General Section: Configure the page where products are displayed, actions when a product is added to the cart, and product ratings options.
- Inventory Section: Activate stock management and set up low stock alerts.
- Downloadable Products Section: Manage download options for digital products.
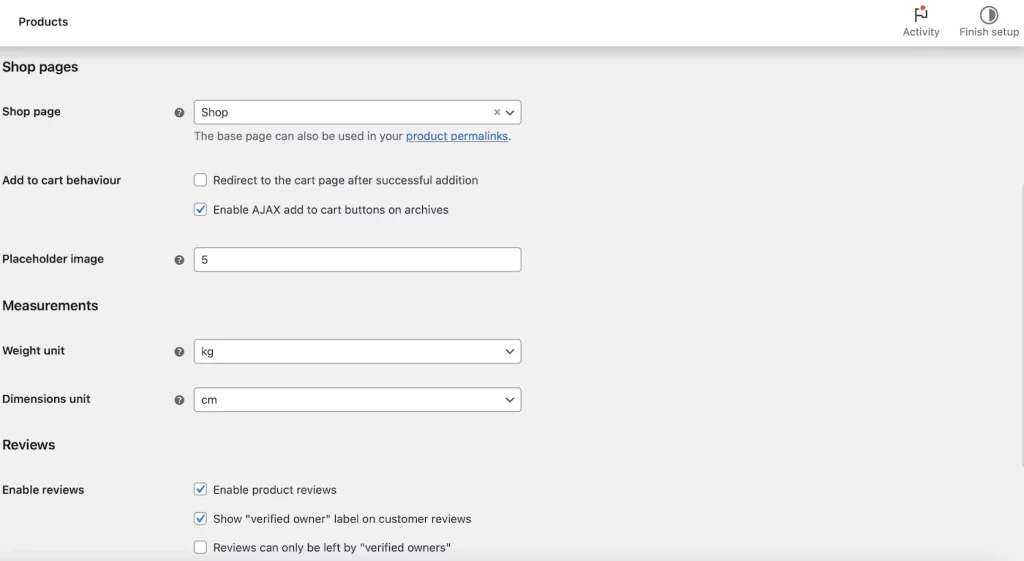
WooCommerce > Settings > Tax
In the Tax tab, you can choose to manage taxes yourself or let WooCommerce Services handle it automatically. If you opt for DIY mode, you can configure:
- Tax settings for products.
- Tax calculation methods.
- Types of taxes.
- How prices (with or without taxes) are displayed on the store frontend.
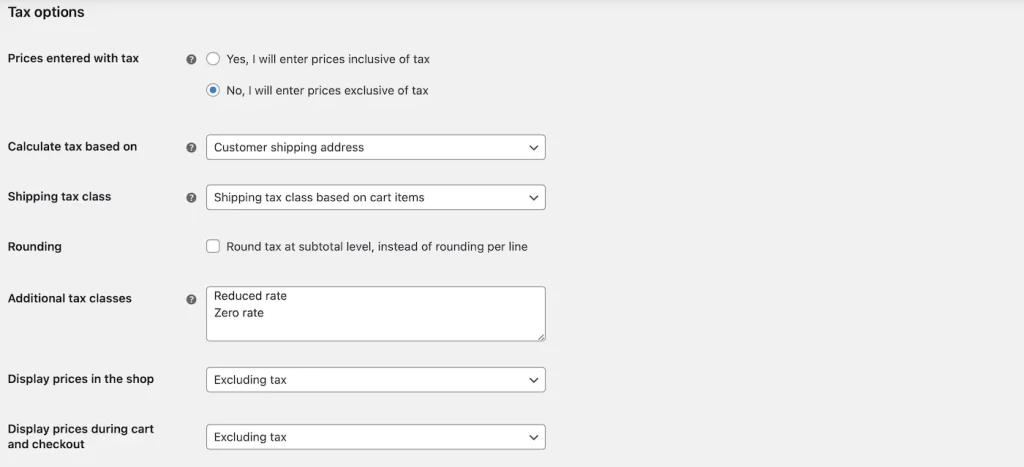
Add the necessary tax rates, specifying:
- Country code (e.g., US for the United States).
- State code (e.g., AL for Alabama).
- Tax rate.
- Tax name.
- Whether it applies to shipping.
WooCommerce > Settings > Shipping
For stores selling physical goods, configuring shipping is essential. Here, you can:
- Set up shipping zones.
- Configure shipping methods and pricing models (fixed rate or free shipping).
- Register new shipping classes.
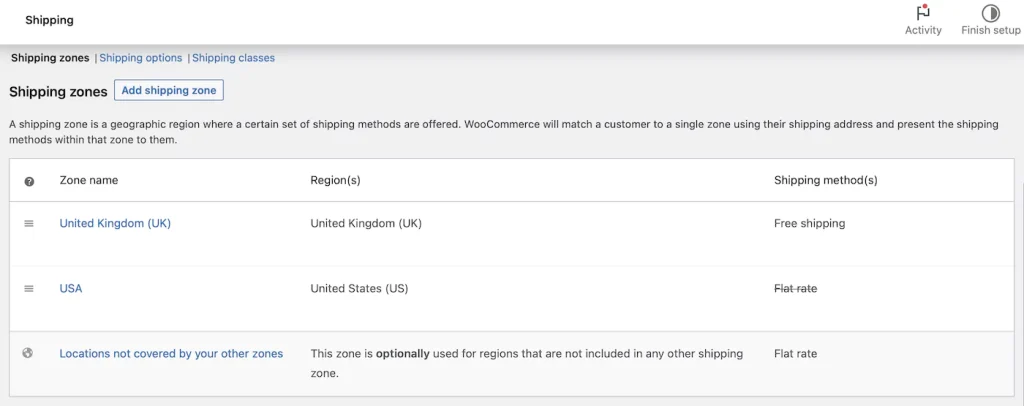
Distance, weight, and product type can significantly impact shipping costs.
WooCommerce > Settings > Payments
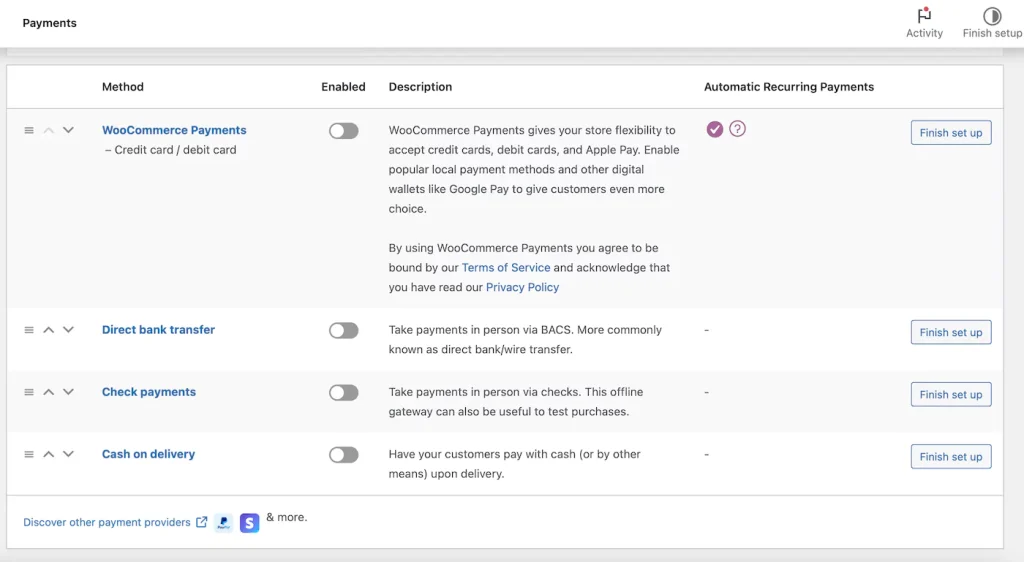
In the Payments tab, you can set up all available payment methods for your store. Only activate the payment options you want to display on the storefront. Each payment method has its own configuration tab for detailed settings.
WooCommerce > Settings > Accounts & Privacy
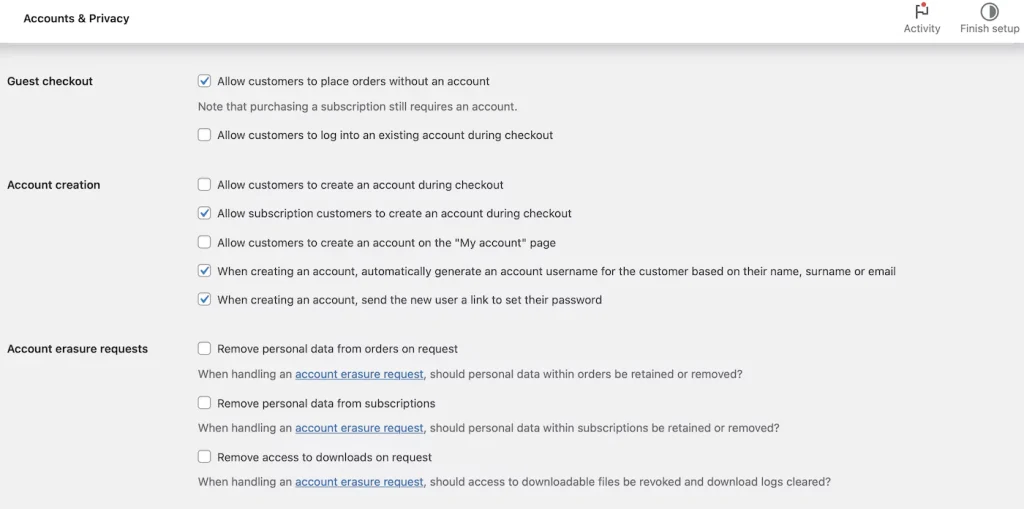
This tab helps ensure compliance with current regulations. Key settings include:
- Allowing guest purchases (recommended to increase conversion rates).
- Managing personal data handling.
- Setting up the store’s policy page.
- Configuring notification messages.
- Determining the retention period for personal data.
WooCommerce > Settings > Emails
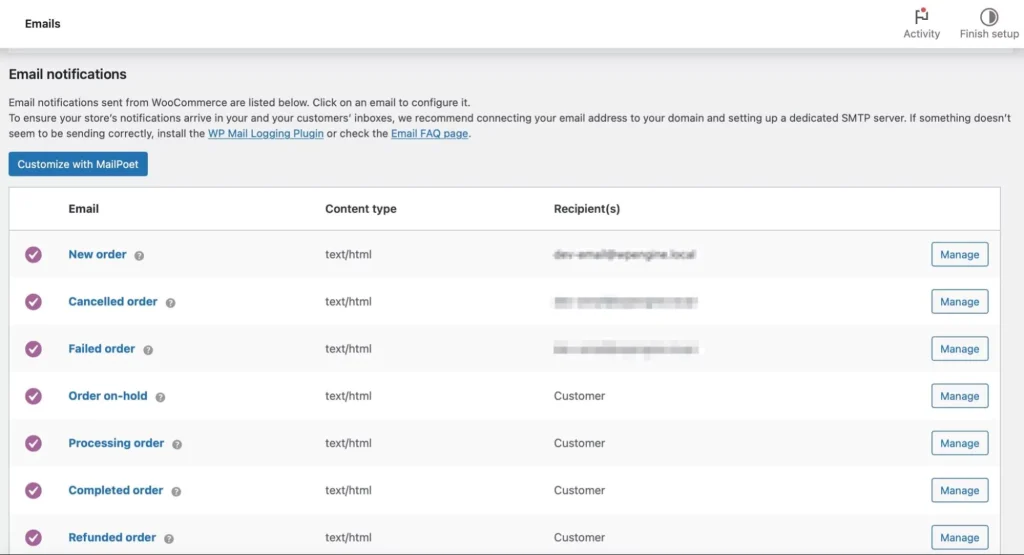
Configure all email communications related to accounts, orders, and shipping information in the Emails tab. Customize each email template to add a personal touch, enhancing the user experience.
WooCommerce > Settings > Integration
If you opted to integrate third-party services during the setup wizard, you can configure them in the Integration tab.
WooCommerce > Settings > Advanced
The Advanced tab groups various developer-oriented settings, such as:
- Page setup.
- REST API.
- Webhooks.
- Legacy API.
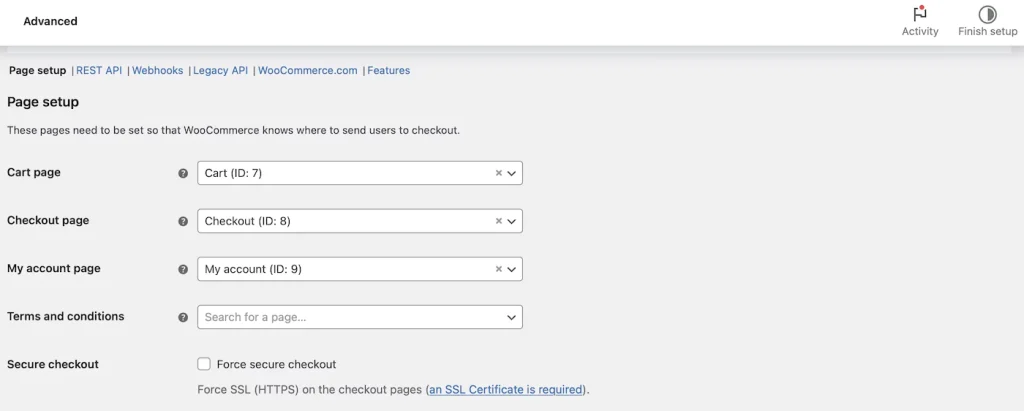
You can also configure the store’s Terms and Conditions. If you are unsure about any settings, it’s best to leave them as default.
WooCommerce > Status
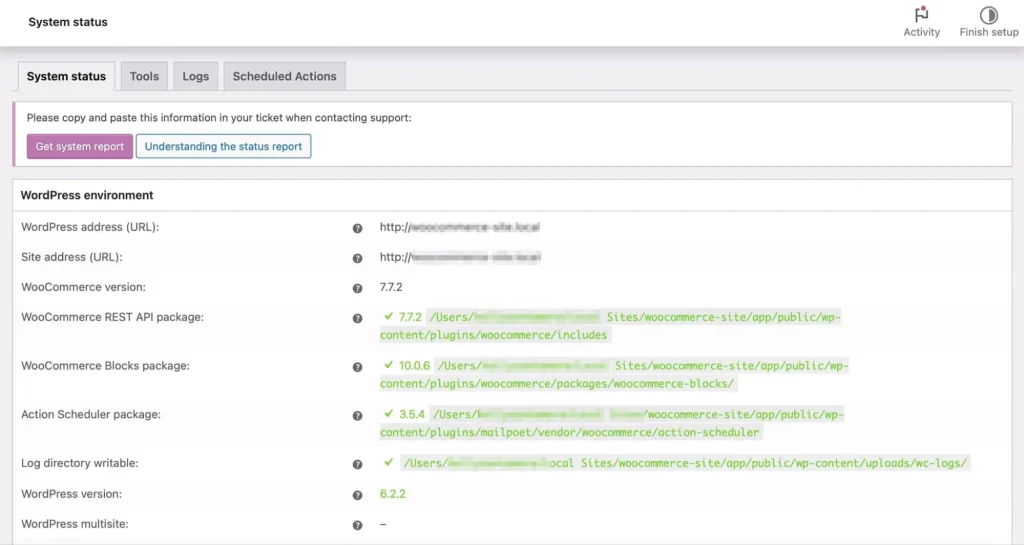
In the System Status section, access technical information about your WooCommerce store and verify its configuration status. This can help troubleshoot and ensure your store runs smoothly.
WooCommerce > Extensions
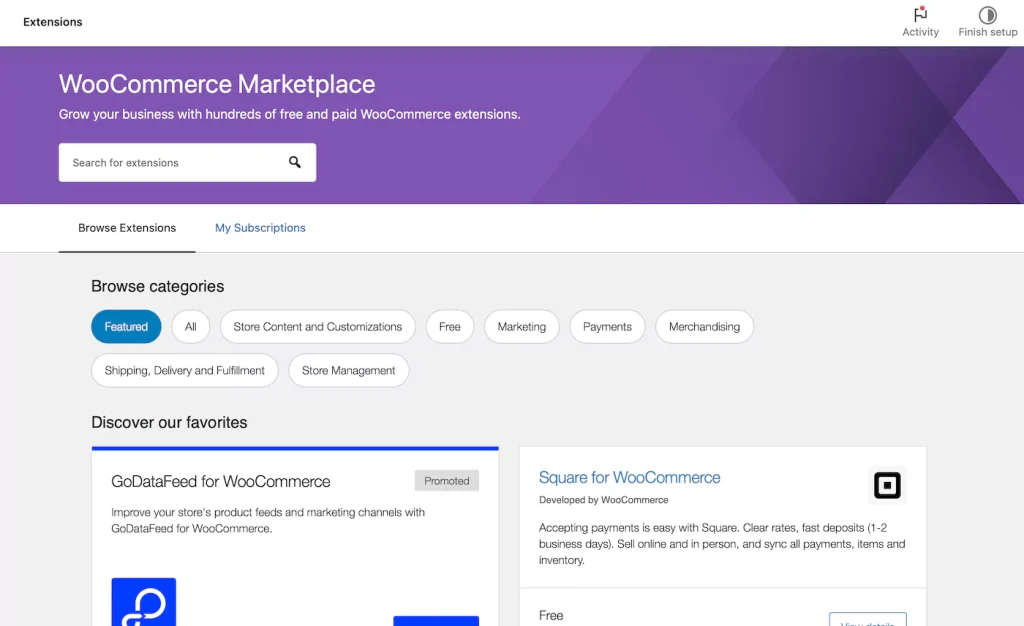
Extensions are what make WooCommerce highly versatile. The Extensions section allows you to add new functionalities to your store without needing a developer. Extensions can be free or paid, with paid extensions often being more cost-effective than hiring a developer. With these settings configured, you’re now ready to create product pages and further customize your WooCommerce store to fit your business needs.
How to Add and Manage Products in WooCommerce
Adding products is essential to launching your WooCommerce store. Before diving into the details, it’s important to understand the basics, including product categories, attributes, and types.
Product Category
Product categories help group similar products, making it easier for customers to find what they’re looking for. For example, if you sell clothing, categories like “Clothing,” “Sportswear,” and “Sleepwear” can be useful. You can create as many categories as needed and modify them at any time.
Product Labels
Labels, such as size, color, fabric, and taste, help filter products and make it easier for customers to find their desired items. Labels can be assigned individually to each product or set up as global labels for the entire site.
Product Data
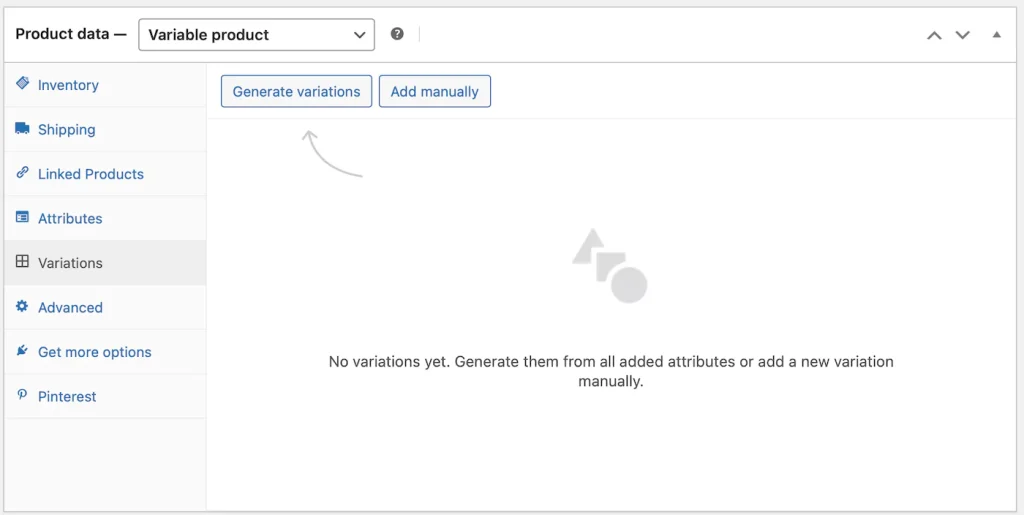
WooCommerce offers several predefined product types to save you time:
- Simple Product: A basic product without options, like a physical book.
- Grouped Product: A collection of similar items sold together, like a set of glasses.
- External/Affiliate Product: A product displayed on your site but sold elsewhere.
- Variable Product: Products with variations like size and color, such as clothing.
- Virtual Product: Non-physical products, such as services, that don’t require shipping.
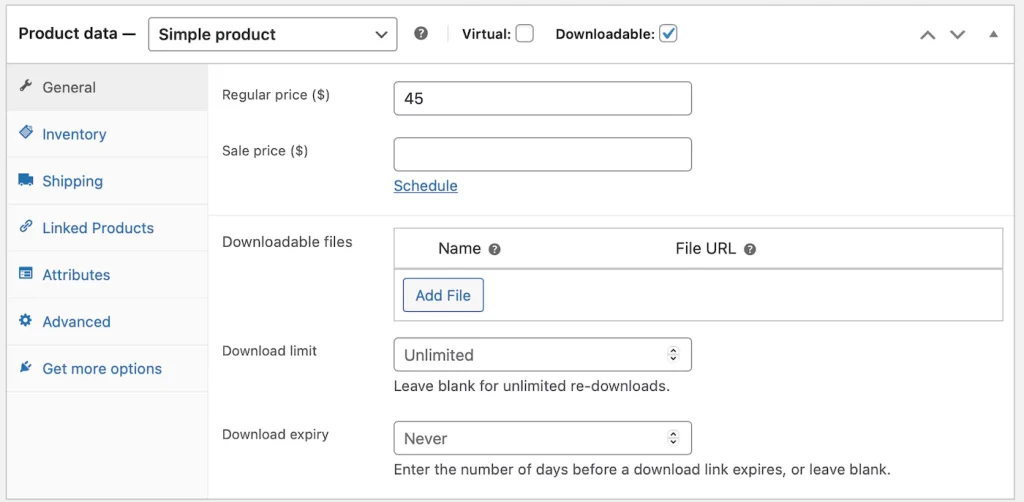
- Downloadable Product: Digital products like music, videos, and eBooks.
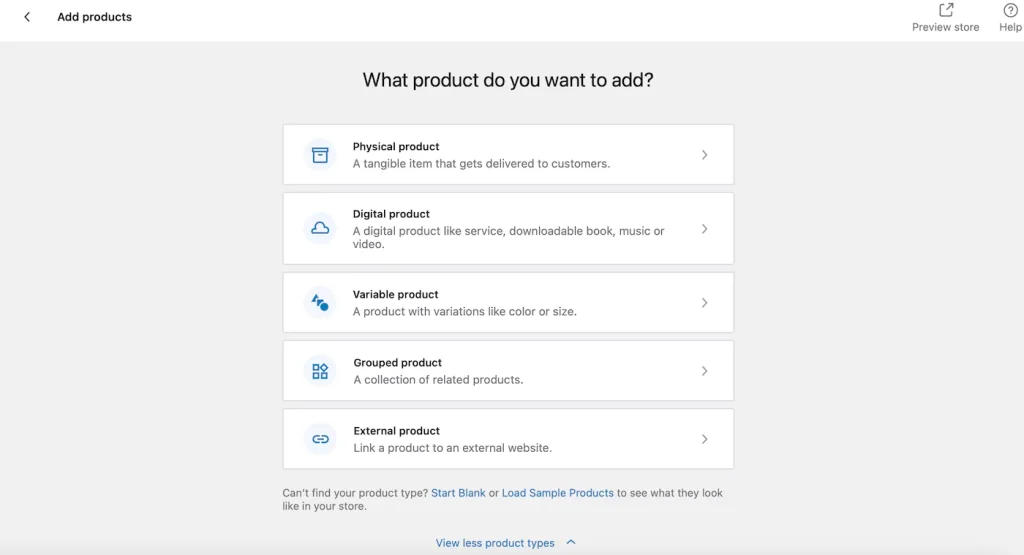
Adding a Product in WooCommerce
Go to Products > Add New
- Enter your product’s title and description. The description should include the most important and relevant information about your product.
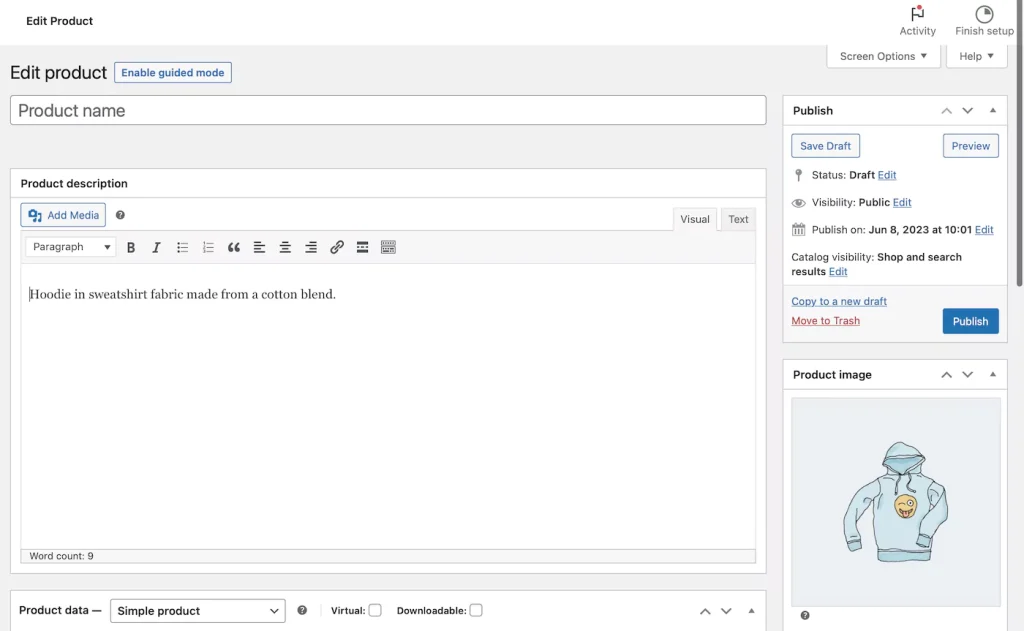
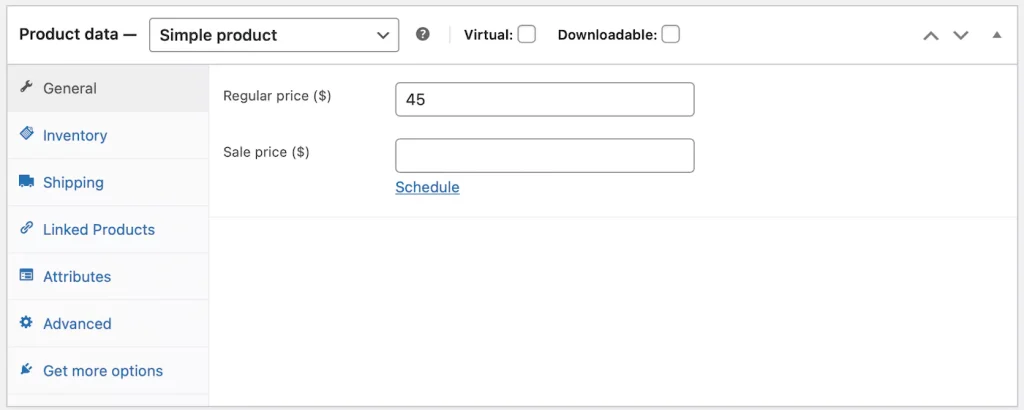
Product Data Section
- This section is where you’ll customize your product. Start with a Simple Product to get familiar with the options:
General
- Set the product price.
- Optionally, set a promotional price and schedule sale dates.
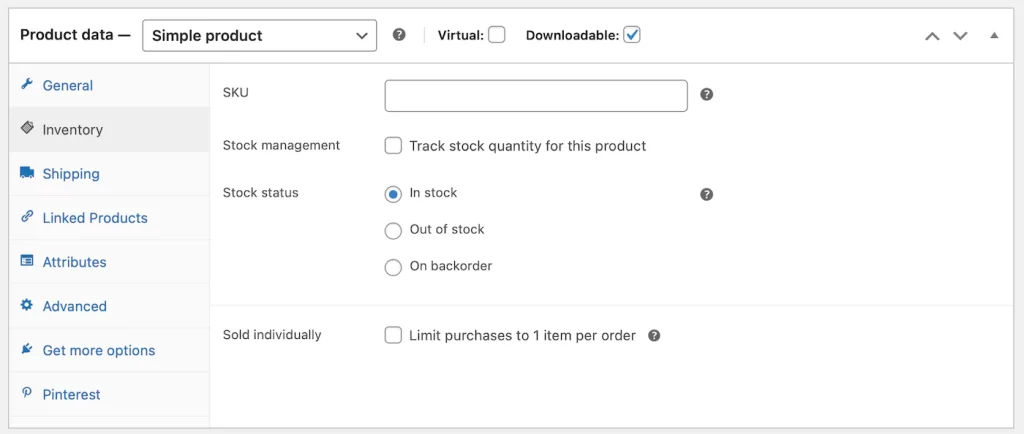
Inventory
- Manage your Stock Keeping Unit (SKU).
- Indicate if the product is in stock or out of stock.
- Use the Sell individually option to limit purchases to one per order.
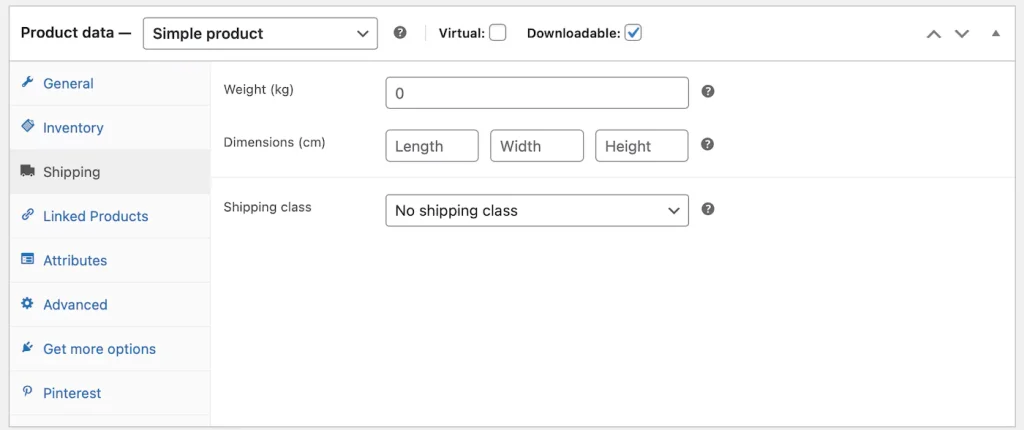
Shipping
- Enter product dimensions and weight.
- Choose a shipping class if applicable.
Linked Products
- Add upsells and cross-sells to promote related products.
- Search for and select related products from the drop-down list.
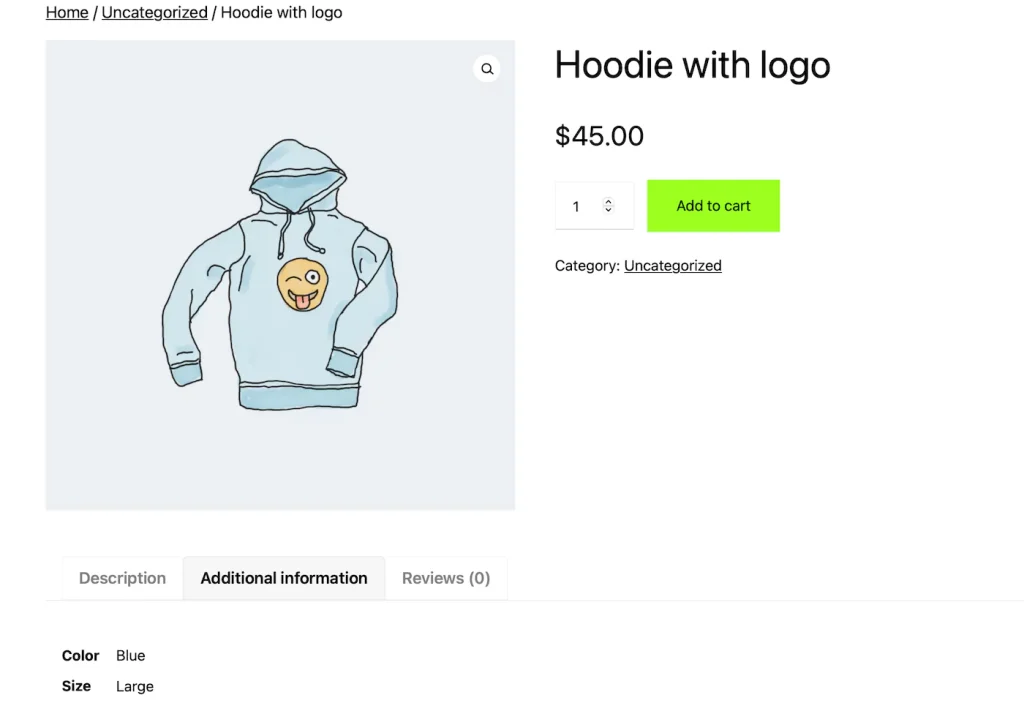
Attributes
- Add product attributes like size and color. This is particularly useful for variable products.
Advanced
- Add purchase notes and enable or disable notifications.
- Set the menu order and custom order positions for your product.
After filling in all the details, click Publish to make your product live.
Organizing Products into Categories
To manage a large catalog, organize your products into categories and subcategories: Go to Products > Categories
- Create new categories as needed.
- You can also create subcategories to further organize your products.
Conclusion
Setting up a WooCommerce store is a strategic move for anyone looking to enter the world of eCommerce. Its popularity stems from its user-friendly interface, extensive customization options, and robust scalability, making it suitable for businesses of all sizes.
The seamless integration with WordPress, combined with a vast array of plugins and themes, allows you to create a unique and efficient online store tailored to your specific needs.
Whether you’re a novice or an experienced online retailer, WooCommerce offers the tools and flexibility needed to succeed in the competitive eCommerce landscape.
With a fully functional WooCommerce store, you’re well-equipped to tap into the vast potential of online retail, driving growth and achieving your business goals.
Frequently Asked Questions
Do I need to have a WordPress website to use WooCommerce?
Yes, WooCommerce is a plugin designed specifically for WordPress. You must have a WordPress website to use WooCommerce.
Is WooCommerce free?
WooCommerce is free to download and use. However, certain extensions and themes may require a purchase, depending on your specific needs.
What payment methods are available with WooCommerce?
WooCommerce supports a variety of payment methods, including PayPal, Stripe, bank transfers, and cash on delivery. You can also add other payment gateways through extensions.
Can I customize the design of my WooCommerce store?
Yes, WooCommerce is highly customizable. You can use a WooCommerce-compatible theme to change the look and feel of your store. Additionally, you can customize layouts, colors, and fonts using the WordPress Customizer or by adding custom CSS.
What shipping options can I set up with WooCommerce?
WooCommerce allows you to set up various shipping options, including flat rate, free shipping, and local pickup. You can also integrate shipping carriers like USPS, FedEx, or UPS through additional plugins.
How do I manage taxes in WooCommerce?
WooCommerce provides built-in tax settings where you can configure tax rates based on your store’s location and customer locations. You can enable automated tax calculations or manually enter rates for different regions.
Can I add discount codes or coupons in WooCommerce?
Yes, WooCommerce includes a coupon management system that allows you to create and manage discount codes. You can set conditions like percentage discounts, fixed cart discounts, free shipping, and more.
Is WooCommerce secure?
WooCommerce is built on WordPress, which is regularly updated for security. WooCommerce itself is also updated frequently. However, it’s important to implement additional security measures like SSL certificates, secure payment gateways, and regular backups.
How do I track orders and manage customers in WooCommerce?
WooCommerce provides an order management system where you can view, edit, and update order statuses. You can also manage customer accounts, view their order history, and communicate with them through your dashboard.
What are WooCommerce extensions and how do I use them?
WooCommerce extensions are additional plugins that add extra features and functionality to your store, such as advanced shipping options, subscription services, and more. You can find and install extensions from the WooCommerce Extensions Store or other third-party sources.
Can I integrate WooCommerce with other platforms or services?
Yes, WooCommerce can be integrated with various third-party platforms and services, such as email marketing tools, social media platforms, accounting software, and more, through the use of plugins and API integrations.
What should I do if I encounter issues with my WooCommerce store?
If you encounter issues with your WooCommerce store, you can check the WooCommerce documentation, visit the support forums, or contact the WooCommerce support team for assistance. Additionally, checking for plugin conflicts or updating outdated plugins/themes may resolve common issues.